پاکستان میں Mostbet com ویب سائٹ ملاحظہ کریں، اور آپ یقینی طور پر کھیلوں پر شرط لگانے یا آن لائن کیسینو میں کھیلنے کے لیے یہاں واپس آنا چاہیں گے۔ کھیلوں کے شائقین کو ایونٹس کے ایک بڑے انتخاب، مختلف پروموشنز اور بونسز، مفت بیٹس، مفت گھماؤ اور زیادہ مشکلات تک رسائی حاصل ہے۔ اور کھیل کو مزید آسان بنانے کے لیے، ہم نے ایک موبائل ایپلیکیشن تیار کی ہے جسے آپ آسانی سے اپنے فون پر انسٹال کر سکتے ہیں۔

Tips for Tuesday..on Wednesday, because Tuesday couldn’t handle tampons.

Today, I want to discuss something that no one wants to address…why my cat keeps peeing under the damn pool table- son of a bitch! Just kidding (though it does need to be addressed), I actually want to talk about “Tampon Maintenance”. I hope you weren’t eating just now.

As you may know, tampons have been linked to Toxic Shock Syndrome. While rare, the chances of developing TSS increases when using higher absorbancy tampons and when leaving them in for far too long. Now I don’t know about you, but I use the high absorbency ones because…well, because like the wrapper says, I’m “Super”…and sometimes I’m even “Super Plus”. So for me, remembering to change my tampons frequently is very, very important. Not to mention, no one wants a red stain as a reminder.

So now you’re probably thinking “Yeah, great point, Kim. How can I easily keep track of my tampon change? And I love what you’ve done with your hair!” Aww, thanks!

The first thing you need to do is to make some scientific calculations based on your flow rate, tampon absorbency, and menstrual duration ( F/A x M x .75= R), where R equals the replacement interval. Based on this formula, I determined that my tampon should be changed every 4 hours.

Here’s the problem…ask anyone who knows me, I’m late for everything except happy hour (I was even late for my own wedding. Brian, I said sorry like a billion times). So I’ve developed two “reminder” methods that can be used separately or together for maximum remindage.


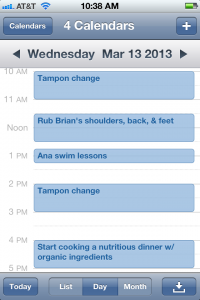
Method #1 – Put it in your calendar and set the alarm to play the Jaws theme- it conjures images of blood (trust me, it’s motivating).

Unfortunately, I kept hitting the snooze button, so I had to develop a back-up method. But what?

As I was pulling out of my driveway one day, I saw the answer right in front of me, literally in front of me- the oil change sticker on my windshield. And method #2 was born…

Method #2– The TEA Bag Tag

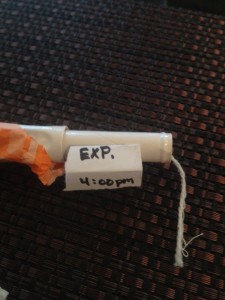
The acronym TEA stands for Tampon Expiration Alert. This involves labeling all of your tampons with their change time. Each time you go to the bathroom, simply glance at the time on your TEA tag to determine if you need to change it out! Let me show you how to set this up.


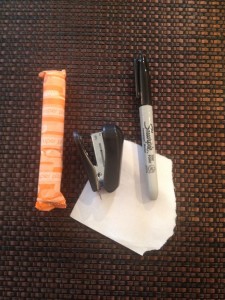
1. You’ll need a tampon (duh), a sharpie (won’t smear), a stapler, and a small piece of paper.


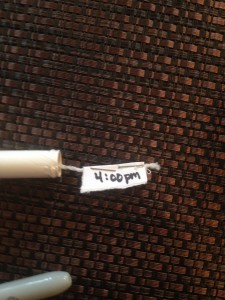
2. Label a small rectangular piece of the paper with the tampon’s expiration time, then fold it horizontally.


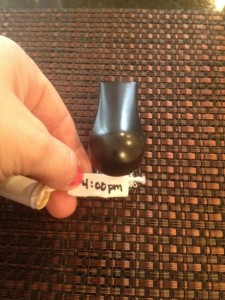
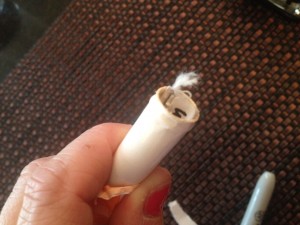
3. Put the tampon string inside the crease and staple the paper to the string…like a tea bag!


4. Tuck the tag inside the tube so it doesn’t get hung up during insertion.


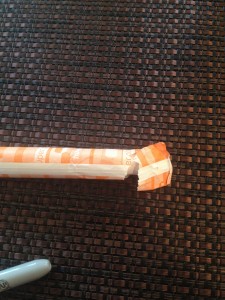
5. Replace back in it’s wrapper and voila!, you’ll always know the answer to the question “Shoot, when should I change my tampon?”

*If you’re keeping more than 1 tampon in your purse, I recommend writing the times on the wrappers so you’ll know in which order to use them.

*Paper may chafe.

*No fact checking was done in the development of this tip.

*Staples may snag pubic hair.

Tips for Tuesday: Mmm, a kidney cleansing dinner!

So I’m on Facebook, minding my own business by reading other people’s business, and I come across this on my cousin’s feed:

CLEAN YOUR KIDNEYS IN $1.00 OR EVEN LESS

Years pass by and our kidneys are filtering the blood by removing salt, poison and any unwanted entering our body. With time, the salt accumulates and this needs to undergo cleaning treatments and how are we going to overcome this?

It is very easy, first take a bunch of parsley or Cilantro (Coriander Leaves) and wash it clean.

Then cut it in small pieces and put it in a pot and pour clean water and boil it for ten minutes and let it cool down and then filter it and pour in a clean bottle and keep it inside refrigerator to cool.

Drink one glass daily and you will notice all salt and other accumulated poison coming out of your kidney by urination also you will be able to notice the difference which you never felt before.

Parsley (Cilantro) is known as best cleaning treatment for kidneys and it is natural!


I say to myself, “Candy Ass (positive self-talk), with all the poison and salt that you ingest on a daily basis, you could use a kidney cleanse…and it sounds easy enough…and it looks kinda refreshing.”

So I made it.

And the results? Let me ask you this, have you ever seen, smelled, or tasted your own urine after eating copious amounts of asparagus? No? Well, I have and this drink is as close as it gets on all accounts.

Urine for a surprise…this tastes like shit.

I read the directions again & again, double checking that I didn’t leave something out, something like food coloring or an ingredient that didn’t taste like soiled grass.

And how the hell does their drink have a froth? Where the hell was my froth? Come to think of it, wouldn’t that require the use of a blender or ice?

This is the point where I would normally scream “false advertising!” and sue, but since they weren’t selling anything, all I can really do is bitch about it…not as satisfying and won’t pay my counseling bills.

So my tip for today…pat yourself on both sides of the lower back and tell your kidneys to, “keep up the good work ‘cuz mama ain’t drinking nobody’s urine!” (psst…was that a double negative implying that I am?)

Love me? Like me? Hey, even if you’re indifferent, I’d appreciate a click on this banner…thanks!
Top Mommy Blogs - Mom Blog Directory

Tips for Tuesday: C-Section Babies, A labor of love!

For the past couple months, I’ve been saying that I’m going to come out with an alternative to Beaver Babies for teaching “where babies come from”. After all, not everyone has a vaginal delivery, I didn’t (normally I would wonder if that was tmi, but I’m pretty sure I crossed that line a long time ago).

Well today is the day that you’ve been waiting for (at least two of you, anyway)…drum roll please…today I’m debuting the C-section Baby tutorial!

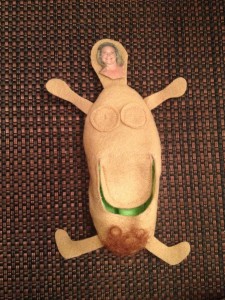
So grab your scissors, felt, and faux pubes and let’s have a baby!


Materials

Felt, glue, faux pubic hair, and random craft crap


Instructions (contact me for templates)

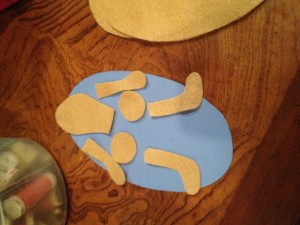
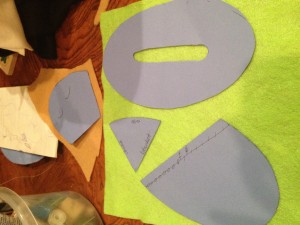
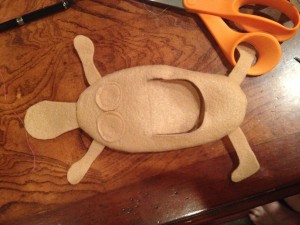
1. First, you’ll need to trace all the templates and cut out the body parts for your mommy. I kinda winged the head.

…then the same for the baby.


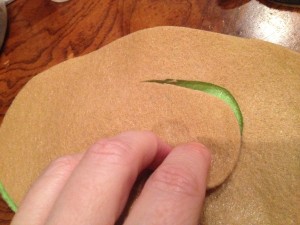
2. match up the back of the baby with the front of the mommy and cut out a c-section opening. Sadly, this one here looks like my first crappy c-section *scar.

* Dr. Cooke, how about the next time you use staples (instead of stitches), you try not forgetting about your patient for weeks. Then maybe you won’t be forced to throw down your Office Depot staple remover in exchange for the pair of industrial pliers you keep hidden in your desk. Just a suggestion. And you suck.


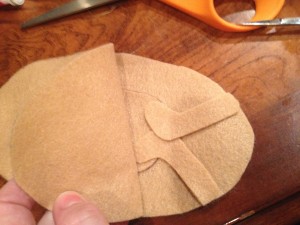
3. Sew the boobies on the mom. Now remember, if you’ve always wanted bigger, perkier boobs, now’s the time. Next, glue just the tips of the body parts on the very edge of the main body then fold them in.  Put the front and back of the mommy together (right sides facing each other) and sew around edges. turn inside out.


Voila!


Ok, my proportions might appear to be off but I assure you, at 5’3, this is how I looked pregnant…like a engorged tick. Make your own damn modifications if it bothers you. I only create what I know.


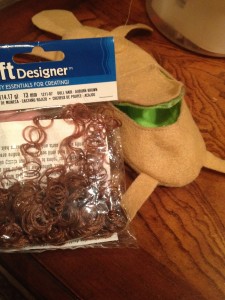
4. Don’t forget to add the piece de resistance…the faux pubic hair!

Tip: We all know that a very pregnant lady can’t even see her vajayjay, let alone shave down there. So to make it look more realistic, apply a shitload of hair, then layer it with more. I was tempted to use the whole damn bag.


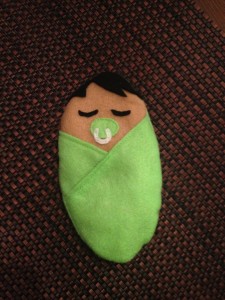
5. Now it’s time to assemble the baby by sewing the facial features and blanket together. Then put the baby front and baby back together (right sides together) and sew around edges, then turn inside out.


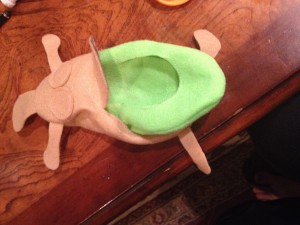
6. It’s time to put them together. Turn the baby inside out and shove it in the mommy’s belly…like nature intended. Then stitch the openings together.


7. Now you can personalize it by adding a photo of the mom-to-be! Here I am…


This pic is from our Christmas card.

Not surprisingly, staring at my face on this doll gave me pregnancy flashbacks and I suddenly felt very exposed. So I sewed myself a little pink maternity dress.


That’s better.


Now you’re ready to explain to your children about the miracle of life through c-section! Let me re-emphasize “your children“- believe it or not, some parents are so uncomfortable discussing anything remotely sexual that they would rather let their children learn about the birds & bees from ignorant 6th graders on the school bus. I should know, I’m one of them.  I’m not busting this thing out until their wedding day.


Vote For Us @ Top Mommy Blogs

Tip for Tuesday- Always try it before you buy it.

I’m a firm believer of the old adage “try it before you buy it”, and I don’t care what it is. Ice cream shop, ask for a spoon. A wine bar, ask for a sip. A book store, read a chapter while sitting in their bathroom stall. A restaurant,…well, you can’t really ask the chef to prepare a bite for you (that would be weird), but what you can do is look around the restaurant for someone eating what you’re thinking of ordering, and ask for a taste. However, DO NOT take more than 1 square inch of food, because that’s rude.

Yesterday, I decided to head out to research some of our upcoming household purchases. We’re currently in need of a stainless steel refrigerator, some outdoor furniture, and a new toilet for the upstairs bathroom. By the way, Brian won’t agree with any of this.

*Brian’s motto: If it ain’t broke, don’t fix it. And if it is broke, learn to live without it.

So I bribed Ana with the promise of purchasing a “cooperation” toy, and we drove out toward Lowes. On our way there, I ordered a pizza for delivery.

Pizza Guy: Your address?

Me: Lowes, the Outdoor Living department. Second table on your left.

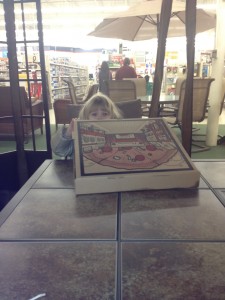
That’s right, I ordered a pizza. Why, you ask? Well, we love to spend our summer evenings eating outdoors and I rarely cook and TRY IT BEFORE YOU BUY IT.

Ana and I both loved the look and feel of the tiles, however, I found that the uneven surface made my wine glass wobble a little bit, making me extremely uncomfortable. Granted, the customers gawking at us didn’t help. I bet this is how celebrities feel when they’re eating out.

After lunch we walked over to the appliance section to see if the leftover pizza and wine would fit in the stainless steel refrigerator that I had my eye on.

Damn it, the wine won’t fit. I guess it’s not meant to be GE.

HOLY SHIT! A dedicated wine holder! Wrap it up!

After eating and storing our food (and my wine) in our new fridge, it was time to check out the toilets.

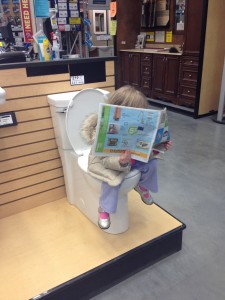
Ana says “Urine for a real treat with this toilet seat! It’s Craptastic!”

It took her 5 toilets before she finally settled on this one- So remember, TRY IT BEFORE YOU BUY IT!


20131117-145147.jpg

Follow

Get every new post on this blog delivered to your Inbox.

Join other followers: